Generating Cardano Block producer Keys
To run a stake pool, three key pairs are needed:
- Cold keys
- KES keys
- VRF keys
To understand the purpose of these keys, refer to Cardano Key Pairs.
First we change to the keys folder we created in last chapter -
cd $HOME/cardano-testnet/keys
Generating Cold Keys
Make a set of cold keys and create the cold counter file.
cardano-cli node key-gen \
    --cold-verification-key-file cold.vkey \
    --cold-signing-key-file cold.skey \
    --operational-certificate-issue-counter cold.counter
Generating KES Keys
cardano-cli node key-gen-KES \
    --verification-key-file kes.vkey \
    --signing-key-file kes.skey
Generating VRF Keys
Make a VRF key pair.
cardano-cli node key-gen-VRF \
    --verification-key-file vrf.vkey \
    --signing-key-file vrf.skey
and update vrf key permissions to read-only.
chmod 400 vrf.skey
StakePool operational certificate generation
Determine the number of slots per KES period from the genesis file.
slotsPerKESPeriod=$(cat ../shelley-genesis.json | jq -r '.slotsPerKESPeriod')
echo slotsPerKESPeriod: ${slotsPerKESPeriod}

slotNo=$(cardano-cli query tip --testnet-magic 1 | jq -r '.slot')
echo slotNo: ${slotNo}
Find kesPeriod by dividing the slot tip number by slotsPerKESPeriod.
kesPeriod=$((${slotNo} / ${slotsPerKESPeriod}))
echo kesPeriod: ${kesPeriod}
startKesPeriod=${kesPeriod}
echo startKesPeriod: ${startKesPeriod}
With this calculation, we can generate an operational certificate for the pool. Change the {startKesPeriod} in script from the value above accordingly.
cardano-cli node issue-op-cert \
    --kes-verification-key-file kes.vkey \
    --cold-signing-key-file cold.skey \
    --operational-certificate-issue-counter cold.counter \
    --kes-period <startKesPeriod> \
    --out-file node.cert
Update Startup Script
If we run gLiveView now, we will see that the node is running as a Relay.
cd ..
./gLiveView.sh

To update the node startup script with the new KES, VRF and Operation Certificate:
cat > startTestNode.sh<< EOF
#!/bin/bash
# Set a variable to indicate the port where the Cardano Node listens
PORT=6001
# Set a variable to indicate the local IP address of the computer where Cardano Node runs
# 0.0.0.0 listens on all local IP addresses for the computer
HOSTADDR=0.0.0.0
# Set a variable to indicate the file path to your topology file
TOPOLOGY=$HOME/cardano-testnet/topology.json
# Set a variable to indicate the folder where Cardano Node stores blockchain data
DB_PATH=$HOME/cardano-testnet/db
# Set a variable to indicate the path to the Cardano Node socket for Inter-process communication (IPC)
SOCKET_PATH=$HOME/cardano-testnet/db/socket
# Set a variable to indicate the file path to your main Cardano Node configuration file
CONFIG=$HOME/cardano-testnet/config.json
# Set the pool keys
KES=$HOME/cardano-testnet/keys/kes.skey
VRF=$HOME/cardano-testnet/keys/vrf.skey
CERT=$HOME/cardano-testnet/keys/node.cert
#
# Run Cardano Node using the options that you set using variables
#
cardano-node run --topology \${TOPOLOGY} --database-path \${DB_PATH} --socket-path \${SOCKET_PATH} --host-addr \${HOSTADDR} --port \${PORT} --config \${CONFIG} --shelley-kes-key \${KES} --shelley-vrf-key \${VRF} --shelley-operational-certificate \${CERT}
EOF
Restart the node:
sudo systemctl reload-or-restart cardano-testnode
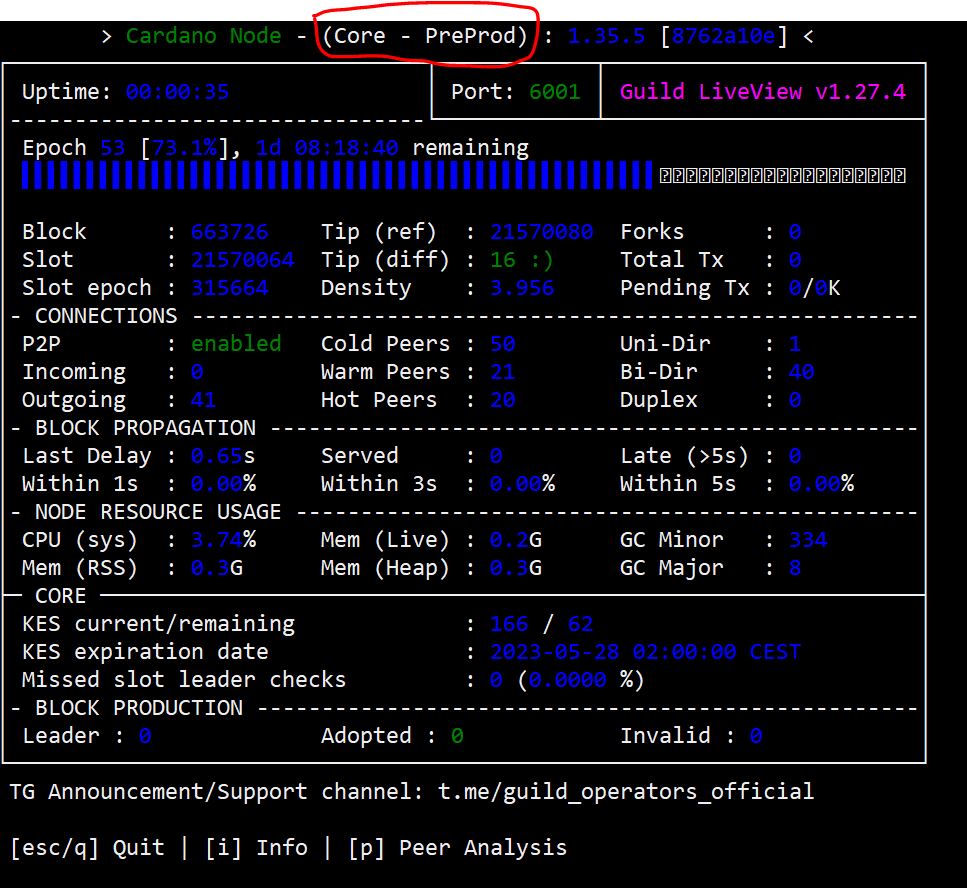
After the restart, if we run gLiveView again we should see that the node has changed from Relay to Core Node:

Now we have converted the relay node to block producing node. The next step will be to register the pool on the network.